
A simple guide to help you set an FTP Backup in Plesk.
1. Log in to your Plesk account.
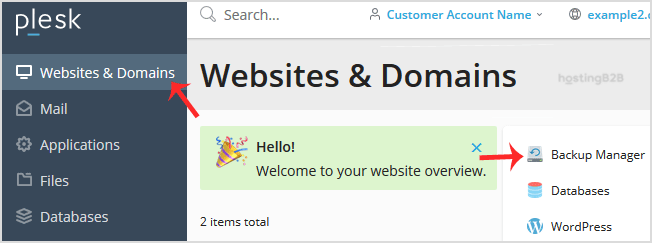
2. Go to Websites & Domains > Backup Manager.

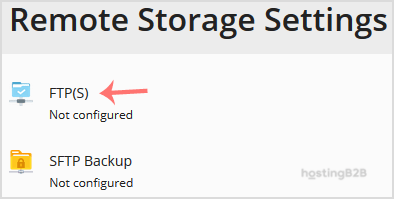
3. Click on Remote Storage Settings.

4. Click on the FTP(S).

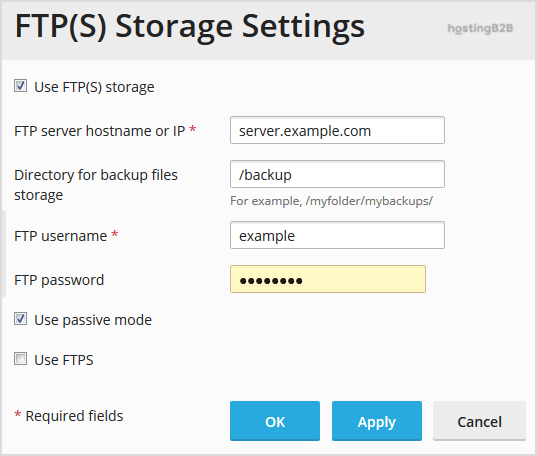
5. Fill in the following details:
– Make sure that Use FTP(S) storage is marked as enabled.
– FTP server hostname or IP: Enter your FTP domain name or IP Address.
– Directory for backup files storage: Enter the path where your backup file will be stored. You can enter directory name such as /backup.
– FTP Username: Enter your FTP username.
– FTP Password: Enter your FTP Password.
– Use passive mode: We recommended to enable it or leave it as it is.
– Use FTPS: You can tick this if your FTP server supports a TLS/Encryption.

6. Click Apply.
If it displays a success message, it means you have successfully configured an FTP(S) backup in your Plesk, and now you can take a backup to your Remote backup server.
Visit our blog for more knowledgebase articles !
The post How to configure an FTP Backup in Plesk? appeared first on HostingB2B.


