
A tutorial on how to create a database username in Plesk.
1. Log in to your Plesk account. (e.g., https://example.com:8443 )
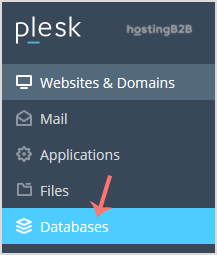
2. In the Sidebar Menu, Click on Databases.
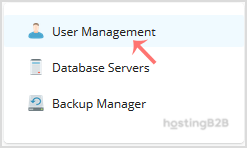
3. In the right sidebar, click User Management.
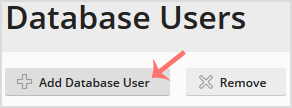
4. Under Database Users, click on the Add Database User button.
5. Under Adding Database User, fill in the following details:
Database user name: Enter a database username such as a blog.
Password: Enter the password or click Generate to generate a secure password. Then click Show and copy the password in a safe place.
Database: Choose the appropriate database from the drop-down menu.
Access Control: Choose Allow local connections only if you do not wish to allow access to a remote host.
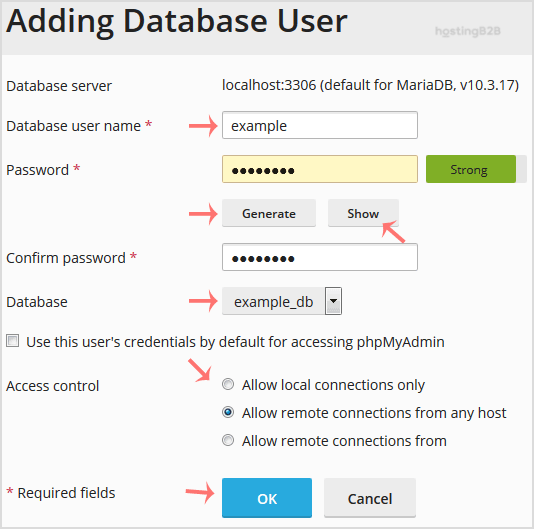
Finally, confirm with OK.
Congratulations you have just created a database username in Plesk.
Visit our blog for more knowledgebase articles !
The post How to create a database username in Plesk appeared first on HostingB2B.