
You can set up a cPanel email account with Microsoft Outlook 2019 and manage your email account.
1. Open Outlook 2019.
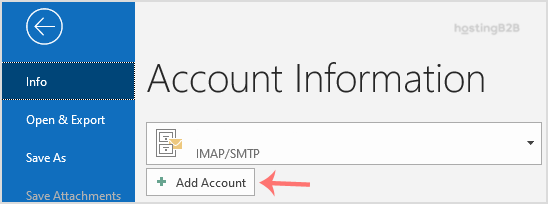
2. Go to File > Info and click on Add Account.
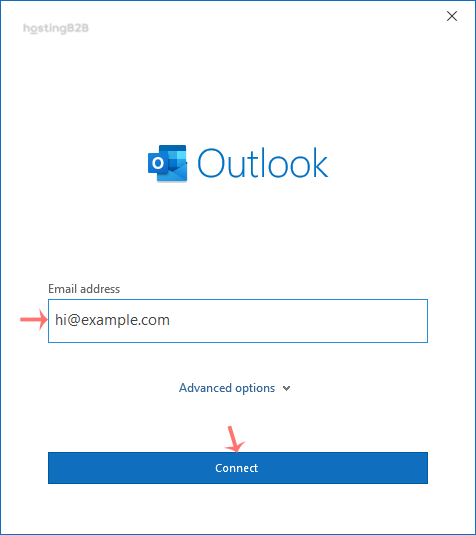
3. Enter your full email address, such as yourname@example.com, and click Connect.
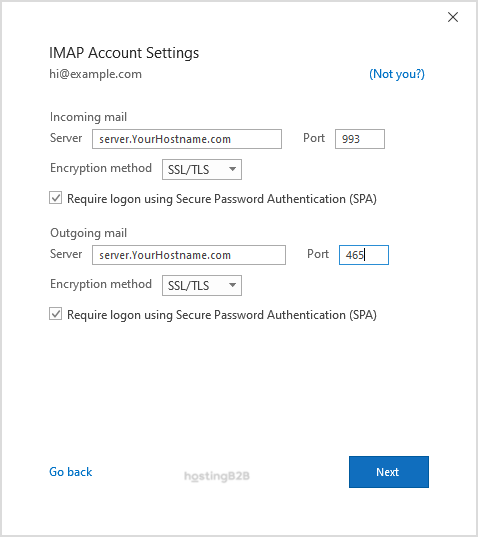
4. In Advance Setup, select IMAP.

5. Enter IMAP details as provided below the screenshot but change the hostname to your server hostname and make sure that your IMAP port is correct.
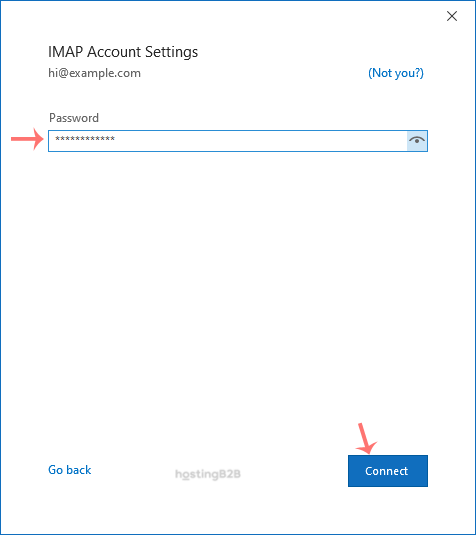
6. Enter your email password and click Connect.
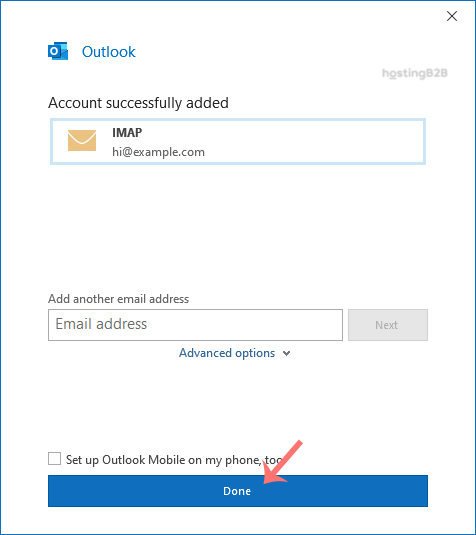
7. Finally, click on Done.
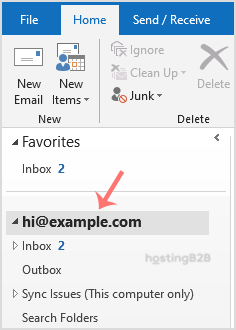
You can now manage your newly-added email from the left sidebar under the Home tab of Outlook.
Congratulations you have successfully set up a cpanel email account in outlook 2019.
Visit our blog for more knowledgebase articles !
The post Set up a cPanel email account with outlook 2019 appeared first on HostingB2B.