A Load Balancer is a crucial component for distributing incoming traffic across your Virtual Machines. This tool boosts the resilience and scalability of your infrastructure, ensuring smooth performance even during traffic spikes.
Step 1: Start the Load Balancer Creation Process
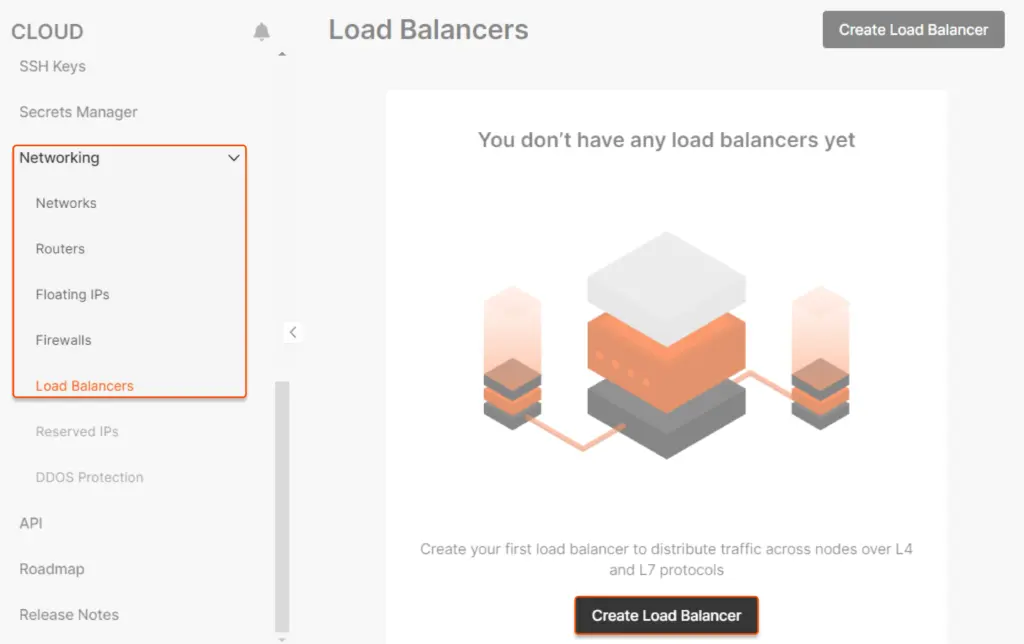
Start by logging into your HostingB2B project. Under the “Networking” section, select “Load Balancers” and hit the “Create Load Balancer” button. A new page will appear, where you can configure the details.
Step 2: Select a Region
Select a region where your Load Balancer will function. Note that traffic distribution can only occur within a single data center.
Step 3: Choose Computing Configuration
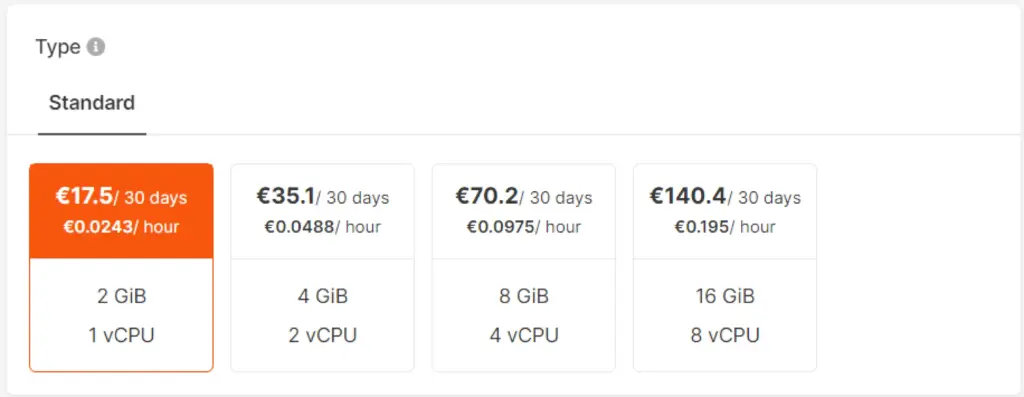
Choose an appropriate configuration for your Load Balancer, such as the amount of GiB and vCPU required. HostingB2B automatically ensures that all Load Balancers are set up in high availability mode, with active and standby instances. If the active one goes down, the standby will take over seamlessly.
Step 4: Network Configuration
Decide whether the Load Balancer will operate on a public or private network and enable optional features:
- Public Network: Reserved IP and IPv6 dual-stack.
- Private Network: Floating IP, reserved IP, and IPv6 dual-stack.

Step 5: Configure Listeners
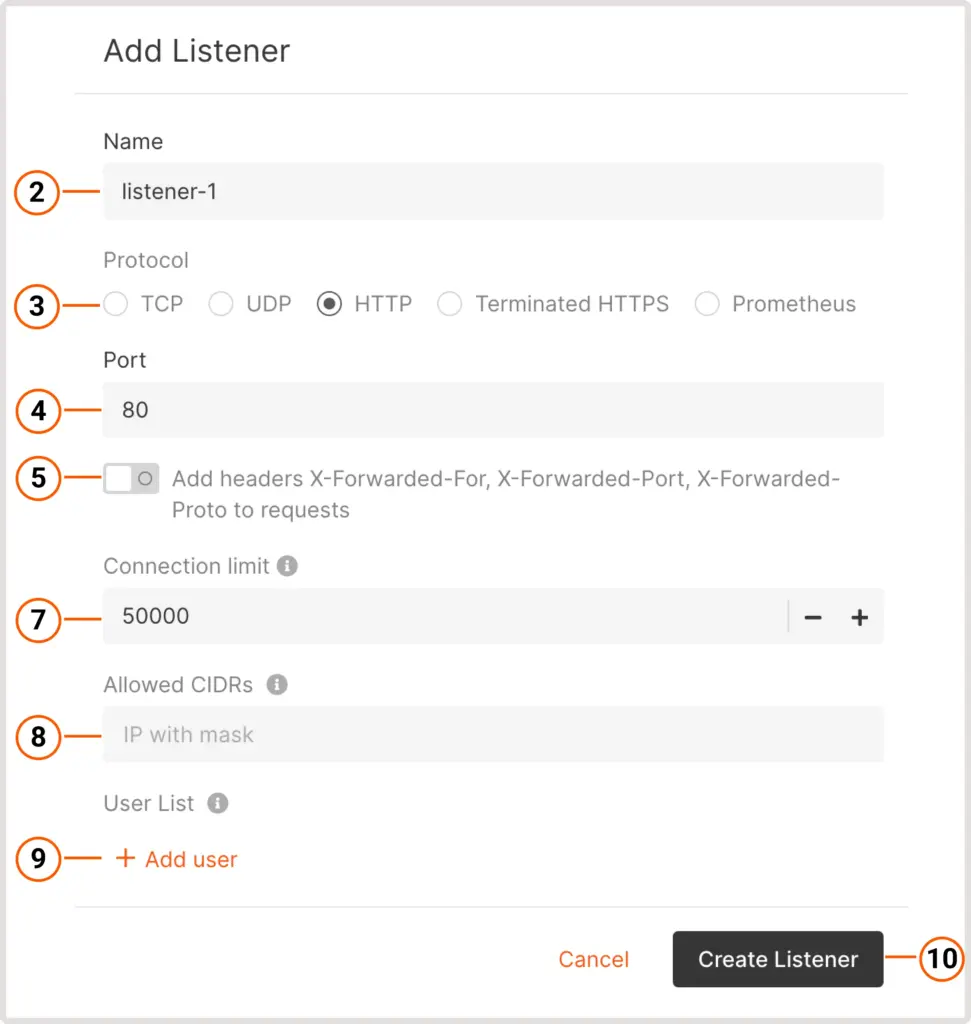
Listeners handle incoming traffic. Here’s how to configure them:
1. Go to the “Listeners” section and click “Add Listener.”

2. Provide a name for the listener.
3. Select the required protocol (e.g., TCP, UDP, HTTP, Terminated HTTPS, or Prometheus).
4. Specify the port for incoming traffic (1–65535).
5. (Optional) Enable headers like X-Forwarded-For to track the origin of requests.
6. For Terminated HTTPS and Prometheus, configure TLS certificates.
7. Set the maximum number of simultaneous connections.
8. (Optional) Restrict access using CIDR ranges.
9. For HTTP listeners, you can enable user authentication by adding usernames and passwords.
10. Click Create Listener to finalize.
Step 6: Configure Pools
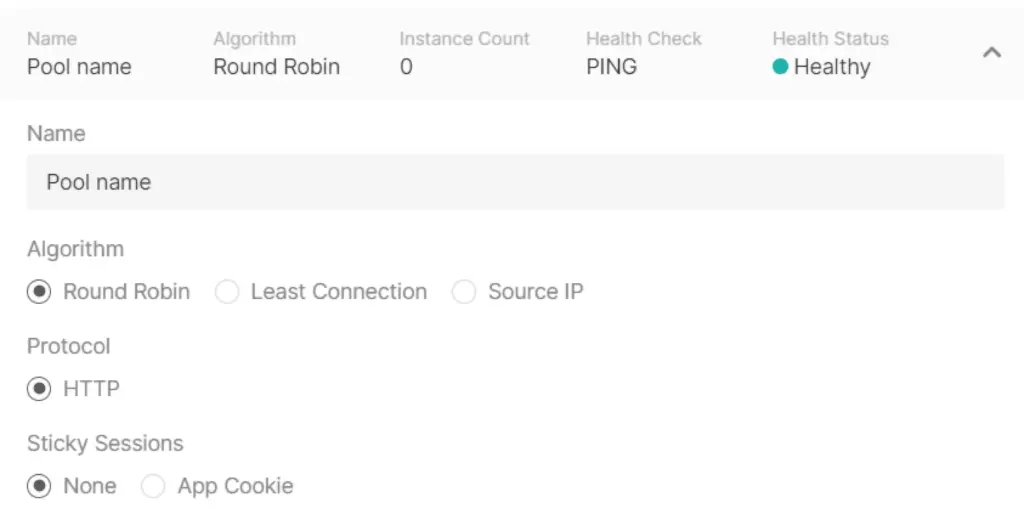
Pools represent the group of Virtual Machines that the listener will direct traffic to.
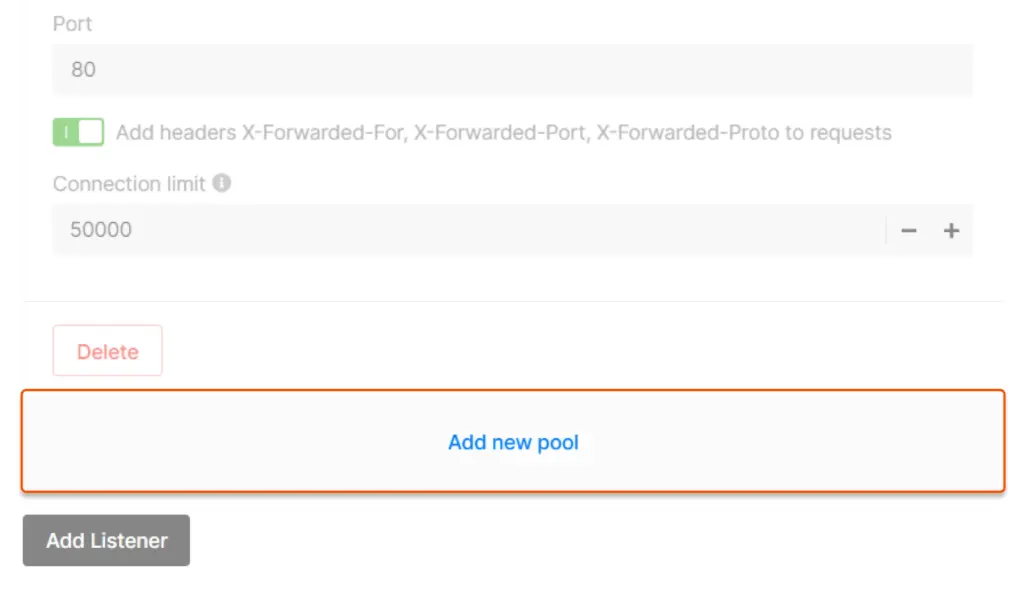
- Click Add New Pool and provide a name.
- Choose a balancing algorithm:
- Round Robin: Distributes requests sequentially.
- Least Connection: Sends traffic to the server with the fewest active connections.
- Source IP: Assigns servers based on the client’s IP address.
- Select a protocol based on the listener’s configuration.
- Enable App Cookie if required.
- Add Virtual Machines by specifying their IP, port, and weight in traffic distribution.

Step 7: Configure Health Checks
Set up health checks to monitor the status of Virtual Machines:
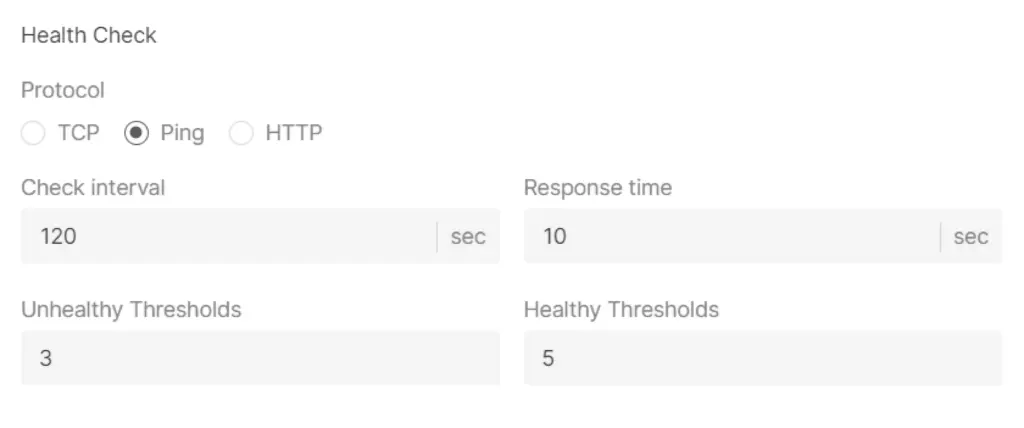
- Choose the protocol for health checks (TCP, Ping, HTTP).
- Define the check interval, response time, unhealthy thresholds, and healthy thresholds.
- Specify timeouts for client data and server connections.

Step 8: Name Your Load Balancer
Provide a name that will be displayed in the HostingB2B Customer Portal.

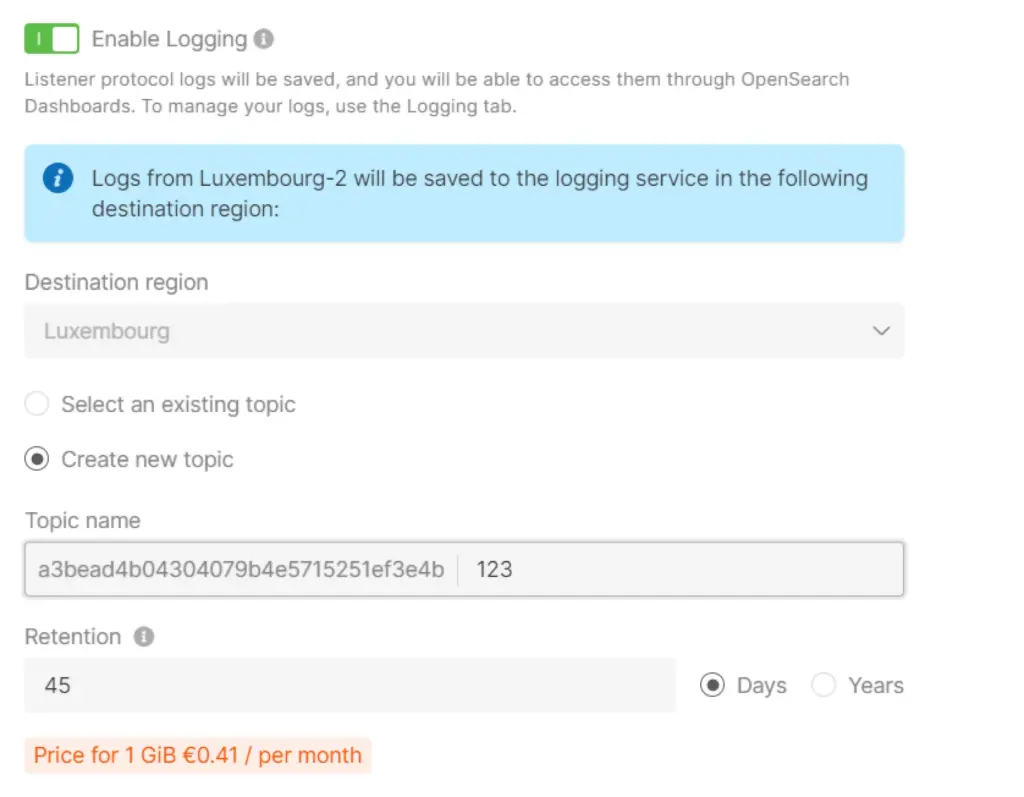
Step 9: Enable Logging (Optional)
Activate the logging service to store your Load Balancer’s logs for future analysis.
Step 10: Add Tags (Optional)
Organize your resources by adding descriptive tags with a “Key” and “Value.”

Step 11: Finalize and Create
Review your configurations and click Create Load Balancer.
Step 12: Configure Firewalls
Set up firewall rules for Virtual Machines in the pool to ensure seamless traffic flow:
- Public Network: Allow traffic to the Load Balancer’s IP in your VM’s firewall settings.
- Private Subnetwork: Permit traffic from the Load Balancer’s private IP or entire subnet.
- Mixed Network: For public Load Balancers and private Virtual Machines, allow traffic from the Load Balancer’s internal IP.

Visit the Load Balancer section in your HostingB2B account to create or edit custom security groups and configure inbound and outbound traffic rules.
By following these steps, you’ll successfully create and configure a robust Load Balancer with HostingB2B. Ready to get started? https://hostingb2b.com/load-balancer/


