
In an enterprise environment, the Linux VPS Hosting as the foundational abstraction layer between your mission-critical applications and the underlying hardware compute. While infrastructure abstraction and containerization (like Docker or Kubernetes) handle application delivery, maintaining the integrity, performance, and security of the host operating system remains a vital operational priority.
Understanding how to Update Kernel Version in Linux is not merely a routine maintenance task; it is a strategic necessity for safeguarding system stability, optimizing resource utilization, and ensuring compliance.
Why Kernel Management Matters for Enterprise IT
From a business and infrastructure perspective, running an outdated kernel introduces technical debt and operational risk. Upgrading your kernel addresses three primary vectors:

- Security Posture & Compliance: The primary driver for kernel updates is vulnerability management. Outdated kernels are susceptible to privilege escalation exploits and critical vulnerabilities (CVEs) that can compromise entire clusters.
- Performance Optimization: Modern kernels introduce enhanced process schedulers, improved I/O throughput, and superior memory management features, directly translating to lower latency for database workloads and microservices.
- Hardware and Feature Enablement: As enterprises adopt cutting-edge hardware—such as advanced NVMe drives, specialized network interfaces, or the latest GPU architectures for AI workloads—newer kernels provide the native drivers required to leverage these hardware investments fully.
Auditing the Existing Kernel Version
Before orchestrating an upgrade across your infrastructure fleet, you must audit the current deployment state. Execute the following commands within your terminal environment to retrieve precise kernel metadata.
The UNAME Utility
To isolate the exact release version currently loaded into memory, utilize the release flag:
uname -r
Expected Output Structure: 6.1.0-21-amd64 (indicating the major version, minor revision, patch level, and architecture).
For a comprehensive system profile including hostname, architecture, and compilation date, expand the query:
uname -a
The System Management Interface
On modern systemd-based distributions, hostnamectl offers a high-level overview of the operating system environment:
hostnamectl
Locate the Kernel entry within the generated output to verify your baseline.
Orchestrating the Kernel Update
Enterprise distributions utilize robust package management systems to handle kernel compilation and dependency resolution automatically. Below are the protocols for the industry’s dominant enterprise distributions.
1. Debian and Ubuntu Server Environments (APT Package Manager)
For systems leveraging advanced package toolsets, ensure your local repositories are synchronized before executing the upgrade.
sudo apt update
sudo apt full-upgrade
⚠️ Enterprise Best Practice: For production servers, prefer
apt full-upgradeoverapt upgradefor kernel maintenance, as it permits the installation of new dependencies required by advanced modern kernels.
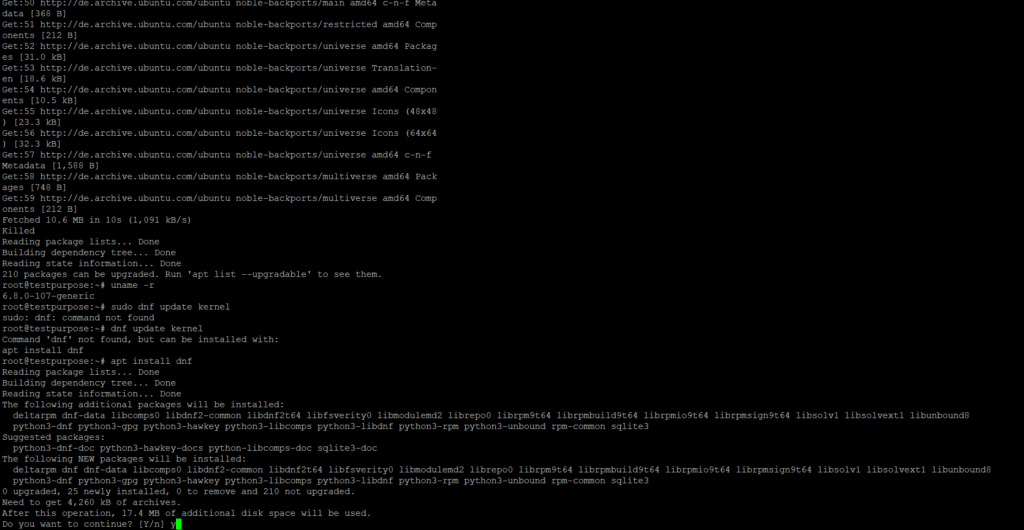
2. Red Hat Enterprise Linux (RHEL), Rocky Linux, and Fedora (DNF Package Manager)
RHEL-based distributions allow targeted kernel updates, minimizing changes to adjacent user-space applications.
sudo dnf update kernel
sudo dnf upgrade
3. Rolling Release Environments (Arch Linux / Pacman)
For continuous delivery environments utilizing Arch Linux, synchronize the package databases and force a system-wide upgrade:
sudo pacman -Syu
Post-Update Verification and Execution
Because the active Linux kernel resides directly within the system’s RAM upon boot, a system reboot is strictly mandatory to initialize the newly installed kernel code.
sudo reboot
Post-Boot Verification
Once the system recovers, validate that the configuration changes were successfully applied by re-running the audit command:
uname -r
Verify that the output matches the target version specified in your distribution’s update logs. If any regressions or anomalies occur during the boot phase, enterprise bootloaders (like GRUB) allow sysadmins to select the previous, stable kernel version from the advanced options menu during initialization, ensuring zero-loss disaster recovery.
Enterprise Change Management and Pre-Reboot Validation
In mission-critical enterprise environments, executing a kernel update extends far beyond running package manager updates. Because a kernel modification directly impacts core system architectures, initiating a reboot without rigorous pre-flight validation introduces unacceptable operational risk.
Implementing a structured change management protocol ensures business continuity, verifies system preparedness, and establishes guaranteed recovery points.
Step 1: Post-Installation Artifact Verification
Before scheduling a system initialization, infrastructure teams must verify that the target kernel packages have been correctly compiled and committed to the storage volume.
Debian / Ubuntu Systems
Audit the local Debian package database to ensure the new linux-image payload is present:
dpkg -l | grep linux-image
RHEL / Rocky Linux / AlmaLinux Systems
Query the RPM package manager to validate that the kernel architecture files are properly staged:
rpm -qa | grep kernel
Step 2: Confirming the Default Boot Target
An installed kernel does not automatically guarantee a successful migration upon reboot. Systems engineers must audit the bootloader (GRUB) configuration to guarantee the system points to the newly deployed kernel binary.
RHEL-Based Deployments (Via Grubby)
Modern Enterprise Linux distributions utilize the grubby command-line tool to manage boot configurations. To inspect the designated default kernel for the next boot cycle, execute:
grubby --default-kernel
Ubuntu / Debian Deployments
For Debian-derived systems, directly inspect the GRUB configuration file to review the prioritized menu entries:
grep menuentry /boot/grub/grub.cfg | head
Step 3: Mitigating Infrastructure Risk (Recovery Points)
To achieve zero-loss disaster recovery, a point-in-time snapshot must be captured immediately prior to issuing a power cycle. If the new kernel encounters an unexpected hardware regression or kernel panic, operations teams can instantly roll back to a known good state.
| Infrastructure Type | Platform | Mitigation Action |
| On-Premises Virtualization | VMware vSphere / Microsoft Hyper-V | Execute a standard Snapshot or Checkpoint (excluding VM memory state to preserve cold-boot disk integrity). |
| Cloud Infrastructure | AWS, Google Cloud, Microsoft Azure | Trigger an immediate block-level snapshot of the root (/) EBS or Persistent Disk volume. |
| Bare-Metal Deployments | Dell iDRAC, HPE iLO, Lenovo XClarity | Validate that Out-of-Band (OOB) management and remote IPMI serial consoles are active, allowing manual GRUB menu intervention if the boot fails. |
Step 4: Operational & Business Readiness Alignment
Technical verification must be coupled with organizational readiness. Before executing the maintenance window:
- Stakeholder Communication: Issue formal notifications to dependent business units, detailing the expected service window, potential disruptions, and Recovery Time Objectives (RTO).
- Backup Validation: Confirm the successful completion and cryptographic integrity of the latest off-site or immutable backups.
- High-Availability Verification: For clustered or load-balanced environments (e.g., Kubernetes worker nodes, database replication pairs), gracefully drain workloads and verify that failover mechanisms successfully re-route active traffic.
- Staging Soak Testing: Ensure that this specific kernel version has successfully undergone a testing lifecycle within a staging or User Acceptance Testing (UAT) environment with mirrored configurations.
Step 5: Orchestrated Maintenance Window Execution
Because kernel upgrades modify the active runtime memory, services will temporarily interrupt during the cycle. This operation should strictly take place during pre-approved, off-peak maintenance windows.
Once all validation checks return a successful state and administrative teams are in position with console access, proceed with the system reboot:
sudo reboot