Subdomains are a powerful way to organize different sections of your website, such as a blog (blog.example.com) or a staging environment (staging.example.com). This guide shows you how to add a subdomain in Plesk, which is available on our web hosting and VPS hosting plans.
1. Log in to your Plesk account.
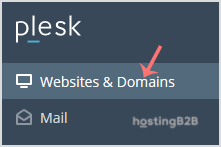
2. In the Sidebar Menu, click on Websites & Domains.

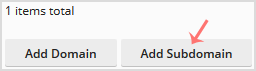
3. Click on Add Subdomain.
4. Enter the subdomain’s name in the subdomain field and choose a website from the domain field. Tick Secure with an SSL/TLS Certificate and press OK. We strongly recommend enabling SSL — you can get a trusted SSL certificate from HostingB2B for production subdomains.
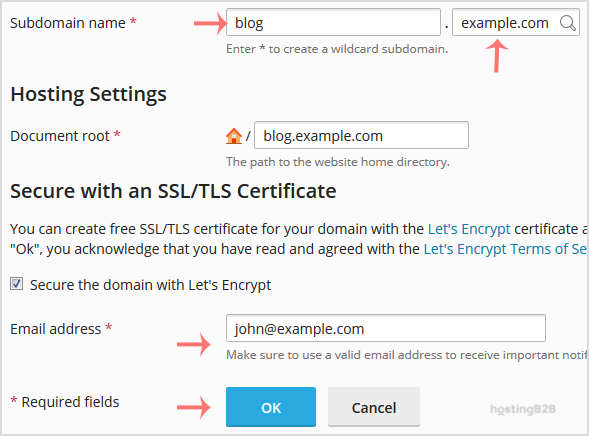
5. Scroll down to the end of the page and confirm with OK.
Once your subdomain is added, you can access it from Websites & Domains. For related Plesk management tasks, see our guides on removing a subdomain or redirecting a subdomain to an external URL.